Open post
drops of water in a switch panel on the electric stainless steel grill, close-up

How to Clean an Outdoor Grill: A Simple Guide for Better Performance

How to Clean an Outdoor Grill: A Simple Guide for Better Performance

Keeping your outdoor grill clean is essential for both performance and flavor. Whether you’re grilling for a weekend gathering or a quiet dinner at home, regular cleaning ensures your grill heats evenly, lasts longer, and produces better-tasting food. If you’re upgrading your outdoor setup or looking to enhance your space with premium heating solutions, Fireside Home Solutions can help. Visit one of our showrooms in Washington and Oregon or contact us to explore options that elevate your entire outdoor living experience.

Why Cleaning Your Grill Matters

A clean grill does more than improve appearance, it directly impacts how your food cooks. Built-up grease and residue can cause uneven heating, flare-ups, and unwanted flavors. Routine maintenance also helps extend the life of your grill and keeps it operating safely.

How Often Should You Clean Your Grill?

The frequency of cleaning depends on how often you grill. Light cleaning should be done after every use, while a deeper clean is recommended every few weeks during peak grilling season. Performing a thorough cleaning at the start and end of each season is also a smart way to maintain long-term performance.

Step-by-Step: How to Clean an Outdoor Grill

1. Preheat the Grill

Turn your grill on high for about 10–15 minutes. This helps burn off excess food debris and grease, making it easier to clean the grates.

2. Brush the Grates

Once the grill is hot, use a grill brush to scrub away any remaining residue. For best results, clean the grates while they are still warm.

3. Turn Off and Cool Down

After brushing, turn off the grill and allow it to cool slightly before continuing with a deeper clean.

4. Remove and Clean Grates

Take out the grates and soak them in warm, soapy water. Use a non-abrasive scrubber to remove stubborn buildup, then rinse and dry thoroughly.

5. Clean the Interior

Wipe down the inside of the grill using a grill-safe cleaner or a mixture of mild soap and water. Remove any debris from the bottom of the grill and empty the grease tray.

6. Wipe the Exterior

Use a soft cloth and appropriate cleaner to wipe down the exterior surfaces, keeping your grill looking like new.

Tips for Maintaining Your Grill

Regular upkeep can make cleaning easier and extend the life of your grill. Cover your grill when not in use, empty grease trays frequently, and perform quick cleanings after each use to prevent buildup. Investing in a high-quality grill also makes maintenance simpler and more effective over time.

If you’re considering upgrading, Fireside Home Solutions offers a premium selection of outdoor grills that are durable, perform well, and look great.

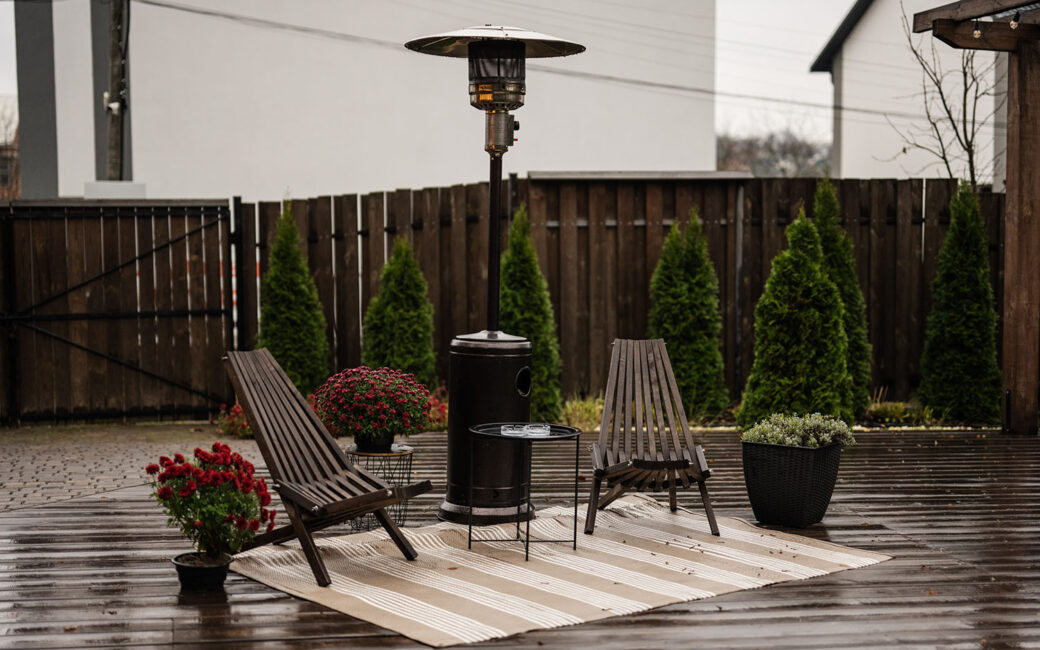
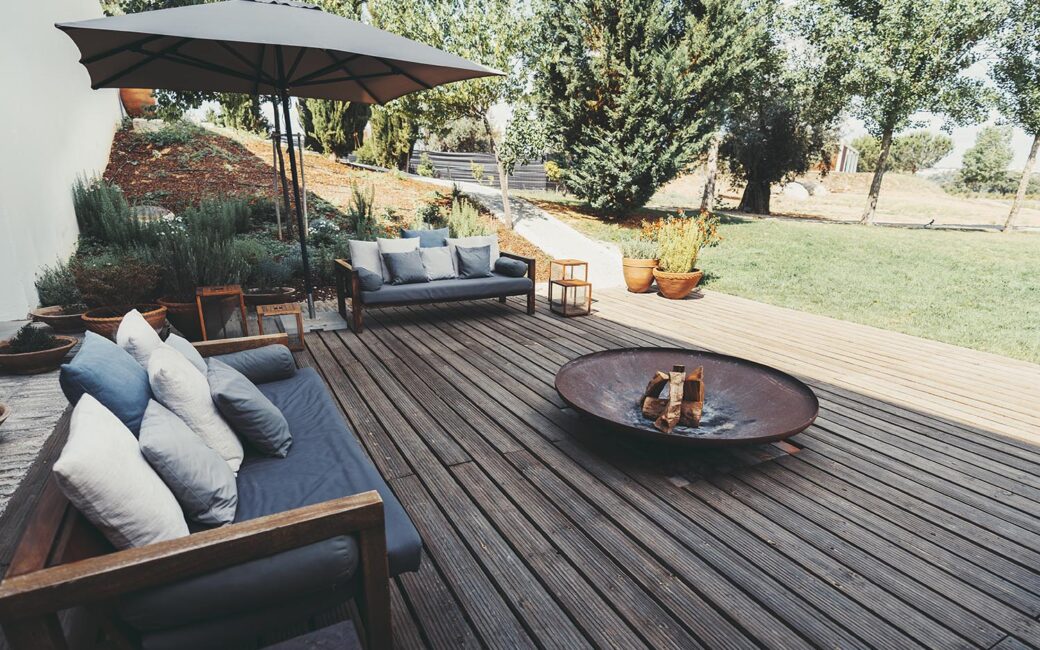
Enhance Your Outdoor Living Space

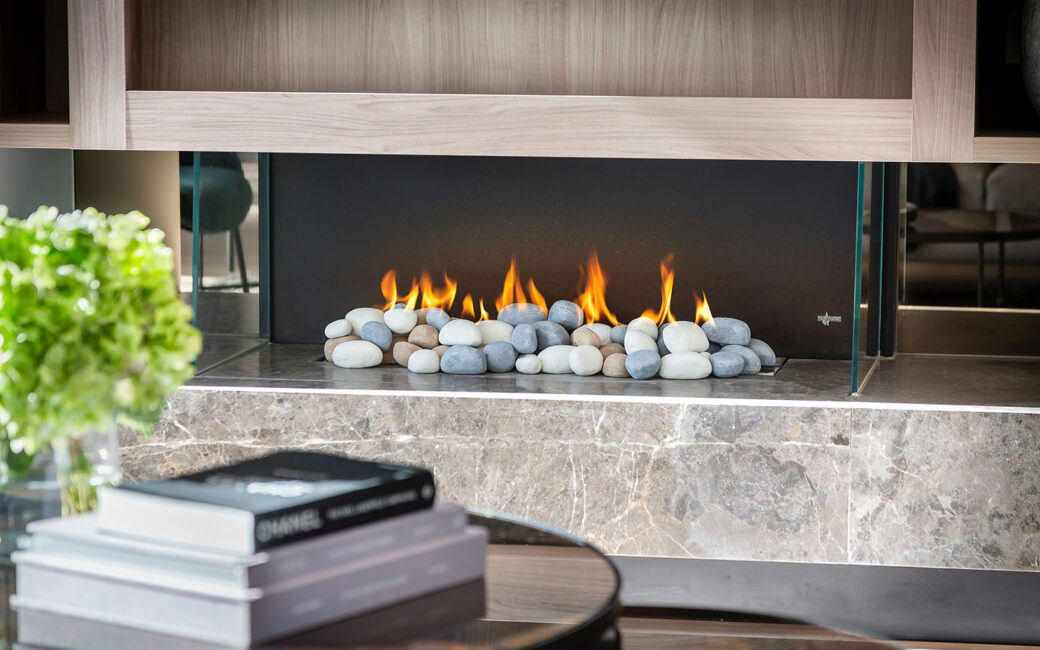
Cleaning your grill is just one part of maintaining a great outdoor setup. Fireside Home Solutions provides everything you need to create a complete outdoor living experience, from high-performance grills to patio heaters and accessories.

Browse our full selection of outdoor heating products to elevate your space and enjoy more time outside year-round. You can also add comfort during cooler seasons with outdoor patio heaters, designed to extend your outdoor season.

Keep Your Grill in Top Shape

Knowing how to clean an outdoor grill is key to getting the best results every time you cook. With consistent care and the right tools, your grill will continue to perform at a high level for years to come.

For expert guidance, premium products, and everything you need to upgrade your outdoor space, Fireside Home Solutions is your trusted partner in outdoor living.

Open post
Stainless steel metal gas outdoor patio heater with wooden chairs and pot with flowers at wet terrace. Place to relax.

Heating an Outdoor Patio: A Complete Guide to Year-Round Comfort

Heating an Outdoor Patio: A Complete Guide to Year-Round Comfort

Spending time outside shouldn’t be limited by dropping temperatures. With the right outdoor heating solution, you can enjoy your patio in every season, whether you're entertaining guests, hosting family gatherings, or simply relaxing at home after a long day. Outdoor heaters make it easy to create a warm, inviting atmosphere that allows you to fully utilize your outdoor space, even as the weather changes.

At Fireside Home Solutions, you’ll find premium options for outdoor patio heaters designed to extend your outdoor living experience with comfort, efficiency, and style. From sleek electric units for covered patios to powerful gas heaters for open-air spaces, our selection is built to enhance both the functionality and aesthetic of your outdoor environment.

Why Invest in Outdoor Patio Heating?

Heating your outdoor patio transforms your space into a year-round destination. Instead of retreating indoors when temperatures dip, you can maintain a cozy, inviting atmosphere outside. Outdoor heaters not only improve comfort but also enhance usability, increase home value, and create a more functional entertaining space.

Fireside Home Solutions offers a wide range of outdoor heating solutions built for durability, efficiency, and long-term performance in changing weather conditions.

Types of Outdoor Patio Heaters

Choosing the right heater starts with understanding your options. Each type offers unique benefits depending on your space, layout, and heating needs, and Fireside Home Solutions carries trusted brands like Patterson, Grayson, and FireMagic to ensure reliable performance and lasting quality.

Freestanding Patio Heaters

Freestanding heaters are one of the most popular options for patios. Typically powered by propane, these units are portable and ideal for open areas or flexible seating arrangements. They deliver strong heat output and can effectively warm larger spaces.

Wall-Mounted & Ceiling Heaters

Electric wall-mounted or ceiling-mounted heaters are perfect for covered patios or smaller areas. They save valuable floor space while delivering targeted, efficient heat. These sleek options blend seamlessly into modern outdoor designs.

Tabletop Heaters

Compact and convenient, tabletop heaters are ideal for intimate seating areas. While they provide less heat output, they’re a great supplemental option for dining tables or smaller patios.

Fuel Types: Which One Is Right for You?

Outdoor heaters come in several fuel types, each with its own advantages depending on your space, heating needs, and installation preferences. Understanding how electric, propane, and natural gas options differ can help you choose the most efficient and convenient solution for your outdoor patio.

Propane Heaters

Propane heaters are highly portable and easy to set up. They deliver strong heat output and are ideal for larger, open patios. However, they require regular tank replacement.

Natural Gas Heaters

Natural gas heaters connect directly to your home’s gas line, offering a consistent fuel supply and lower long-term operating costs. These are best for permanent installations.

Electric Heaters

Electric heaters are energy-efficient, low-maintenance, and ideal for covered or enclosed patios. They provide instant heat and are often more environmentally friendly.

Key Factors to Consider When Heating an Outdoor Patio

Selecting the right outdoor patio heater goes beyond simply choosing a fuel type; it’s about finding a solution that aligns with how you use your space. From layout and seating arrangements to environmental conditions and design preferences, several factors can influence how effectively your patio is heated.

Patio Size & Layout

Larger patios may require multiple heaters or higher BTU (British Thermal Unit) output. Smaller spaces benefit from compact, targeted heating solutions, like electric wall-mounted units.

Coverage Area

Each heater has a specific heat radius. Be sure to choose a model that matches your seating area to ensure even warmth.

Climate & Exposure

Windy or open areas may require more powerful heaters, while covered patios can retain heat more effectively.

Aesthetics & Design

Modern outdoor heaters are designed to complement your space. Fireside offers design-forward options that enhance both comfort and style.

Enhance Your Outdoor Living Experience

Heating your patio is just one part of creating the perfect outdoor space. Fireside Home Solutions also offers a full range of outdoor living products, including premium outdoor grills to complete your setup.

Pairing a high-quality heater with a premium grill creates a fully functional outdoor entertainment area you can enjoy year-round.

Upgrade Your Outdoor Patio with Fireside Home Solutions

Creating a comfortable, year-round outdoor space starts with the right heating solution, and the right team to support you. Fireside Home Solutions offers a curated selection of outdoor patio heaters designed for performance, durability, and style, along with personalized recommendations to help you choose the best fit for your space. Whether you're enhancing an existing patio or building a new outdoor living area, our experts are here to guide you every step of the way.

From product selection to professional installation, Fireside ensures your heater is set up safely and efficiently, especially for gas-powered or permanent units that require expert handling. Our dedicated service team also provides ongoing maintenance and support to keep your heater running at peak performance season after season. If you’re ready to transform your outdoor space, contact Fireside Home Solutions and get started today.

Open post
Outdoor patio area with wooden deck, cushioned sofas, and a fire pit. An umbrella provides shade, and the garden is landscaped with various plants and trees, creating a cozy ambiance

Can You Put a Fire Pit on a Wood Deck?

Can You Put a Fire Pit on a Wood Deck?

If you’re upgrading your outdoor living space, you may be wondering: Can you put a fire pit on a wood deck? It’s a common question, especially for homeowners who want to enjoy warmth and ambiance without rebuilding their entire backyard setup.

The short answer is: it depends on the type of fire pit, your deck construction, and the safety precautions you take. Wood decks are combustible surfaces, so placing a fire pit directly on them without protection can be dangerous. Below, we’ll break down what you need to know before using a fire pit on a wood deck and how to do it safely.

Is It Safe to Put a Fire Pit on a Wood Deck?

A traditional wood-burning fire pit should never be placed directly on a wood deck. Wood decks can:

  • Ignite from stray embers
  • Scorch from radiant heat
  • Suffer structural damage from prolonged exposure to high temperatures
  • Trap heat beneath the fire pit, increasing fire risk

Even if flames never directly touch the deck, heat transfer alone can create a hazardous situation.

However, certain fire features may be used safely with proper precautions.

Types of Fire Pits and Deck Compatibility

Not all fire pits are created equal. The type you choose makes a significant difference.

Wood-Burning Fire Pits

Wood-burning fire pits produce:

  • High heat output
  • Flying embers
  • Ash and sparks

Because of these factors, wood-burning fire pits are not recommended for use on wood decks, even with a protective barrier. They are best placed on non-combustible surfaces such as concrete, pavers, or stone patios.

Propane or Natural Gas Fire Pits

Gas fire pits are generally safer than wood-burning models because they:

  • Produce controlled flames
  • Do not emit embers
  • Burn cleaner

That said, they still generate heat and require clearance from combustible materials. If you plan to use a gas fire pit on a wood deck, you must use a heat-resistant barrier and follow manufacturer clearance guidelines carefully.

Tabletop Fire Features

Smaller tabletop fire bowls may seem harmless, but even compact units can produce enough heat to damage decking if placed directly on wood. Protective layers are still necessary.

How to Safely Use a Fire Pit on a Wood Deck

If you are considering placing a gas fire pit on your wood deck, follow these safety precautions:

1. Use a Fire-Resistant Deck Protector

Install a non-combustible barrier beneath the fire pit, such as:

  • Fire pit mats rated for high heat
  • Cement board
  • Stone or paver base
  • Metal heat shields

The barrier should extend beyond the base of the fire pit to catch stray heat and prevent scorching.

2. Maintain Proper Clearance

Always follow the manufacturer’s clearance requirements. Most fire pits require:

  • Several feet of clearance from walls and railings
  • No overhead obstructions
  • Adequate space from furniture

Never place a fire pit directly against your home’s siding or under a covered overhang unless it is specifically rated for that use.

3. Check Weight Limits

Some fire pits, especially stone or concrete models, are extremely heavy. Confirm that your deck structure can safely support the added weight.

4. Monitor Constantly

Never leave a fire pit unattended on a wood deck. Keep a fire extinguisher nearby and avoid using the fire pit during windy conditions.

What About Built-In Outdoor Fireplaces?

If you love the idea of a fire feature but want something safer and more permanent, a professionally installed outdoor fireplace may be a better solution.

Outdoor fireplaces are:

  • Installed on non-combustible bases
  • Built to meet safety codes
  • Properly vented
  • Designed for controlled heat output

At Fireside Home Solutions, we offer a wide selection of outdoor fireplaces designed to elevate your backyard experience safely. A professionally installed system eliminates the guesswork and reduces the risks associated with portable fire pits on wood decks.

Can You Put a Fire Pit on a Composite Deck?

Composite decking is more heat-resistant than traditional wood, but it is still considered combustible. Heat can cause:

  • Warping
  • Discoloration
  • Structural weakening

The same precautions apply; always use a protective barrier and verify manufacturer guidelines for both the decking material and the fire pit.

Local Codes and HOA Rules

Before installing or using a fire pit on your deck, check:

  • Local fire regulations
  • City or county burn restrictions
  • HOA guidelines
  • Insurance policy requirements

Some municipalities restrict open flames on elevated decks, particularly in densely populated areas. Homeowners in the Seattle and Portland regions should be especially mindful of seasonal burn bans and local fire safety regulations.

Safer Alternatives for Deck-Friendly Warmth

If placing a fire pit directly on your wood deck feels risky, consider:

  • Installing a designated fire pit area on a stone patio
  • Adding a built-in outdoor fireplace
  • Creating a protected corner with non-combustible materials
  • Installing a professionally designed gas system

These options provide warmth and ambiance while minimizing structural and safety concerns.

When to Consult a Professional

You should speak with a fireplace or outdoor living professional if:

  • You’re unsure about clearance requirements
  • You want to install a gas line
  • You’re considering a built-in outdoor fireplace
  • You want to ensure compliance with local building codes

Fire features involve combustion, ventilation, and clearance requirements that should never be guessed.

Create a Safer Outdoor Living Space with Fireside Home Solutions

At Fireside Home Solutions, we help homeowners throughout Washington and Oregon design safe, beautiful outdoor spaces that bring people together. Whether you’re exploring outdoor fireplaces, gas systems, or upgrading your backyard setup, our experienced team can guide you toward a solution that fits your home and lifestyle.

Explore Fireside Home Solutions' fireplace and outdoor heating options, visit one of our local showrooms, or contact us to discuss your outdoor fire feature options. We’re here to help you enjoy warmth, comfort, and peace of mind, without compromising safety.

Open post
Detached family house exterior with cobblestone driveway to the garage and spruce garden

How to Align Garage Door Sensors: A Step-by-Step Guide for Homeowners

How to Align Garage Door Sensors: A Step-by-Step Guide for Homeowners

If your garage door won’t close and the opener lights are blinking, misaligned sensors are often the cause. Many homeowners search for how to align garage door sensors when their door suddenly stops functioning properly. The good news? In many cases, sensor alignment is a simple fix.

Below, we’ll explain how garage door sensors work, how to tell if they’re misaligned, how to align them safely, and when it’s time to call a professional for garage door service.

What Do Garage Door Sensors Do?

Garage door safety sensors, also called photo-eye sensors, are small devices mounted near the bottom of each side of your garage door track. They create an invisible beam across the doorway.

If anything interrupts that beam while the door is closing, the system automatically stops and reverses the door. This safety feature helps prevent injury, damage to your vehicle, and harm to pets or children.

When the sensors are misaligned, the beam connection is broken, even if nothing is in the way. That’s when your garage door may:

  • Refuse to close
  • Reverse immediately after starting to close
  • Blink the opener lights
  • Require you to hold the wall button continuously to close

Signs Your Garage Door Sensors Are Misaligned

Before adjusting anything, confirm that alignment is actually the issue. Common signs include:

Blinking Sensor Lights

If one or both lights are blinking, alignment is likely off. Most sensors have small LED lights. Typically:

  • One light remains solid (sending sensor)
  • The other should also be solid (receiving sensor)

The Door Won’t Close

If the door opens normally but won’t close unless you hold the wall button, sensor alignment may be the problem.

Recently Bumped or Disturbed Sensors

Even a slight bump can disrupt the beam connection. Sensors can easily be knocked out of position by:

  • Trash cans
  • Bikes
  • Lawn equipment
  • Children or pets
  • Minor vehicle contact

How to Align Garage Door Sensors Step by Step

If you’re comfortable performing light maintenance, follow these steps carefully.

Step 1: Turn Off Power (Optional but Recommended)

For added safety, unplug the garage door opener or switch off the breaker. While sensor alignment is generally low-risk, disconnecting power prevents accidental operation.

Step 2: Locate the Sensors

Find the small photo-eye units mounted 4–6 inches above the floor on each side of the garage door track. They should be facing each other directly.

Step 3: Check for Obstructions

Before adjusting alignment, inspect for:

  • Dirt or dust on the lens
  • Spider webs
  • Leaves or debris
  • Objects partially blocking the beam

Clean the lenses gently with a soft cloth. Sometimes cleaning alone solves the issue.

Step 4: Loosen the Mounting Bracket

Using a screwdriver or wrench (depending on your model), slightly loosen the screws holding the misaligned sensor in place. Do not remove them completely, just loosen enough to move the sensor.

Step 5: Adjust the Sensor Position

Slowly move the sensor up, down, or side-to-side until:

  • The LED light stops blinking
  • Both sensor lights remain solid

When both lights are solid and steady, the sensors are aligned correctly.

Step 6: Tighten the Bracket

Carefully tighten the mounting screws while holding the sensor steady. Be sure not to shift it out of alignment while tightening.

Step 7: Test the Garage Door

Restore power if disconnected. Open the garage door fully, then attempt to close it using the remote or wall button.

If the door closes smoothly without reversing, the alignment is successful.

What If Aligning the Sensors Doesn’t Fix the Problem?

If your garage door still won’t close after aligning the sensors, there may be other issues, including:

  • Damaged sensor wiring
  • Faulty sensors
  • Track misalignment
  • Opener logic board malfunction
  • Broken springs or balance problems

In these cases, professional diagnosis is recommended. Attempting complex repairs without proper training can lead to injury or further damage.

Fireside Home Solutions offers comprehensive garage door repair and service, including sensor diagnostics and full system inspections.

How to Prevent Garage Door Sensor Alignment Issues

While occasional adjustments are normal, you can reduce future issues by:

  • Keeping the area around sensors clear
  • Avoiding bumping the tracks with equipment
  • Scheduling routine garage door maintenance
  • Having annual safety inspections performed

Fireside’s 18-point safety inspection checks sensor functionality, door balance, springs, tracks, and opener components to ensure everything operates safely and efficiently.

Can I Replace Garage Door Sensors Myself?

While sensor replacement may seem simple, compatibility with your opener model is critical. Wiring errors or improper installation can disable your safety system entirely.

If your sensors are cracked, wires are frayed, or the LED lights don’t turn on at all, replacement may be necessary. A certified technician can:

  • Confirm compatibility
  • Install new sensors properly
  • Test safety features
  • Ensure compliance with local safety standards

When to Call a Professional

Garage door systems operate under high tension, especially springs and cables. Professional service ensures your system is safe, aligned, and functioning correctly. You should contact a garage door technician if:

  • Sensor lights won’t turn on
  • Wiring appears damaged
  • The door continues reversing after alignment
  • You hear grinding or straining sounds
  • The door appears uneven or unbalanced

Trust Fireside Home Solutions for Garage Door Service

At Fireside Home Solutions, we help homeowners throughout Washington and Oregon keep their garage doors operating safely and reliably. Whether you need help aligning garage door sensors, repairing an opener, replacing springs, or installing a new system, our certified technicians are ready to assist.

We service Seattle, Bellevue, Tacoma, Kent, Portland, Beaverton, and surrounding communities with prompt, professional garage door repair. The Fireside Home Solutions team is here to help you protect your home, improve convenience, and keep your garage door running smoothly year-round. Schedule your garage door service today, and contact our team with any additional questions about garage door sensors or maintenance.

Open post
A gas fireplace with stones in a chic living room

Do Gas Fireplaces Work Without Electricity?

Do Gas Fireplaces Work Without Electricity?

If the power goes out during a winter storm, many homeowners immediately wonder: Do gas fireplaces work without electricity? The answer depends on the type of gas fireplace you have.

Some gas fireplaces can operate during a power outage, while others require electricity for certain features. Below, we’ll explain how gas fireplaces work, which models function without power, and what you should know before relying on your fireplace during an outage.

How Do Gas Fireplaces Work?

Gas fireplaces use natural gas or propane as their fuel source. Unlike wood-burning fireplaces, they don’t rely on logs or open flames. Instead, they use a controlled gas burner system to produce consistent heat and realistic flames. Most modern gas fireplaces include:

  • A gas valve system
  • An ignition source (pilot light or electronic ignition)
  • A venting system (direct vent, vent-free, or natural vent)
  • Optional features like blowers, remotes, and thermostats

Whether your fireplace works without electricity depends largely on how it’s ignited and what features it uses.

Types of Gas Fireplaces and Power Outages

Standing Pilot Gas Fireplaces

Gas fireplaces with a standing pilot light can typically operate without electricity.

A standing pilot system keeps a small flame burning continuously. When you turn on the fireplace, that pilot light ignites the main burner. Because it does not rely on an electronic ignition system, it can function during a power outage. However, keep in mind:

  • The blower fan may not operate without electricity.
  • You may still get radiant heat, but air circulation may be reduced.

These models are often considered reliable backup heat sources during winter storms.

Electronic Ignition Gas Fireplaces

Many newer gas fireplaces use electronic ignition systems instead of a standing pilot light. These systems require electricity to spark the flame.

If your fireplace uses electronic ignition and lacks a battery backup, it will likely not function during a power outage. Some models include:

  • Battery backup systems
  • Optional battery-powered ignition modules

If your fireplace has a battery backup, it may still ignite and operate during an outage.

Direct Vent Gas Fireplaces

Direct vent gas fireplaces are sealed systems that draw air from outside and vent exhaust outdoors. Whether they work without electricity depends on the ignition type.

  • Standing pilot direct vent systems often work during outages.
  • Electronic ignition direct vent systems typically require electricity unless equipped with backup power.

Will My Gas Fireplace Still Produce Heat Without Power?

If your gas fireplace operates without electricity, you’ll still receive radiant heat from the flames. However:

  • The blower fan may not run.
  • Heat distribution throughout the room may be slower.
  • Thermostat control may not function.

Even without a blower, many gas fireplaces can still provide meaningful warmth, especially in smaller spaces.

How Can I Tell If My Gas Fireplace Works Without Electricity?

If you’re unsure about your system, check:

  • Your owner’s manual for ignition type details.
  • Whether your fireplace has a visible pilot light.
  • If your unit includes a battery backup compartment.

You can also contact a professional technician for a system inspection to determine how your specific model operates.

If you need assistance evaluating your fireplace, Fireside Home Solutions offers professional fireplace service throughout Washington and Oregon.

Can a Gas Fireplace Be Used as a Backup Heat Source?

Yes, many homeowners install gas fireplaces specifically for emergency heat during power outages. Advantages include:

  • Immediate warmth
  • Clean-burning fuel
  • No need to store firewood
  • Simple operation

However, a gas fireplace should not replace a whole-home heating system. It’s best used to maintain comfort in one main living area.

What About Vent-Free Gas Fireplaces?

Vent-free gas fireplaces do not require a chimney or external vent. Because they are self-contained systems, many models with standing pilot lights can operate without electricity.

Still, vent-free systems must be properly sized and installed to meet safety codes. Professional installation and inspection are essential.

Are Gas Fireplaces Safe to Run During a Power Outage?

Gas fireplaces are generally safe during outages if:

  • They are properly maintained
  • Venting systems are clear
  • Carbon monoxide detectors are functioning
  • Manufacturer guidelines are followed

Never attempt to modify ignition systems or bypass safety features to make a fireplace work without electricity. Routine service helps ensure your system is safe and ready when you need it most.

Should I Upgrade to a Gas Fireplace with Battery Backup?

If backup heat is important to you, consider:

  • Installing a gas fireplace with a standing pilot
  • Choosing a model with battery backup ignition
  • Adding a battery backup kit (if compatible)

At Fireside Home Solutions, our team can help you choose a gas fireplace that aligns with your heating goals and local climate needs.

Trust Fireside Home Solutions for Fireplace Expertise

At Fireside Home Solutions, we help homeowners throughout the Seattle and Portland regions stay warm, informed, and confident in their fireplace systems. Whether you’re installing a new gas fireplace, upgrading to a battery backup model, or scheduling routine maintenance, our experienced team is here to guide you.

Visit one of our showrooms in Bellevue, Tacoma, Kent, Beaverton, or Portland to explore your options in person. Contact our team or schedule service now to ensure your fireplace is prepared for the next power outage. We’re here to help you stay comfortable, no matter what the weather brings.

Open post
Flickering Effects Ceramic Wood Logs

What Are Gas Logs?

What Are Gas Logs?

If you love the look of a traditional fireplace but want a cleaner, more convenient experience, gas logs are a popular option worth exploring. Designed to replicate the appearance of real wood while offering the ease of gas operation, gas fireplace logs provide instant ambiance without the mess, maintenance, or prep work of a wood-burning fire.

Below, we’ll explain what gas logs are, how they work, and why many homeowners choose them as an alternative to traditional fireplaces or more complex gas systems.

SCHEDULE SERVICE NOW

What Exactly Are Gas Fireplace Logs?

Gas logs are specially designed ceramic or refractory logs that sit inside an existing fireplace and connect to a gas supply. When turned on, gas flows through a burner beneath the logs, producing realistic flames that wrap around and between the logs to mimic the look of a natural wood fire.

Gas logs are commonly installed inside:

  • Existing wood-burning fireplaces
  • Masonry or prefabricated fireplaces
  • Approved gas-ready fireboxes

Because they’re designed to work with your existing fireplace structure, gas logs are often one of the simplest ways to upgrade from wood to gas.

How Do Gas Logs Work?

Once installed, gas logs operate using a straightforward system:

  • Gas supply connection: The log set connects to your home’s natural gas or propane line.
  • Burner system: Gas flows through a burner designed to distribute flames evenly for a natural appearance.
  • Ignition method: Depending on the model, ignition may be manual, millivolt, or electronic.
  • Flame control: Some systems allow basic flame adjustment, while others are designed for steady, consistent output.

When activated, the flames rise through the logs, creating the visual appeal of a traditional fire — without hauling wood, cleaning ash, or dealing with smoke.

Vented vs. Vent-Free Gas Logs

Gas logs generally fall into two main categories:

Vented Gas Logs

Vented gas logs are installed in a fireplace with a working chimney or venting system. They produce highly realistic flames and glowing embers, closely resembling a wood fire. Because the chimney remains open, vented gas logs are designed primarily for ambiance rather than heating.

Vent-Free (Ventless) Gas Logs

Vent-free gas logs do not require a chimney and are designed to burn very efficiently. They release heat directly into the room, making them more effective for supplemental warmth. Like all vent-free systems, they must be installed according to manufacturer specifications and local building codes.

Choosing between vented and vent-free gas logs depends on your fireplace setup, heating goals, and local regulations — and professional guidance is key.

Why Homeowners Choose Gas Logs

Gas logs offer several advantages over traditional wood-burning fireplaces:

  • Convenience: Turn your fire on and off with a switch or remote
  • Low maintenance: No ash, soot, or chimney sweeping required
  • Clean operation: No smoke, sparks, or flying embers
  • Classic look: Enjoy the appearance of a wood fire without the work

They’re especially appealing for homeowners who want a cozy, traditional fireplace experience with modern simplicity.

Explore Gas Logs at Fireside Home Solutions

At Fireside Home Solutions, we help homeowners throughout the Seattle and Portland areas find gas fireplace products that fit their homes, lifestyles, and design preferences. Our showrooms feature a wide range of gas log styles, finishes, and flame presentations — so you can see the difference in person and explore what works best for your space.

Our experienced team can also help you understand installation requirements, venting considerations, and how gas logs compare to other gas fireplace options.

Ready to explore your options? Visit a Fireside Home Solutions showroom or contact our team to get expert guidance on choosing a fireplace product that brings comfort, convenience, and style to your home.

Open post
Flame and logfire in the fireplace

Vented vs. Ventless Gas Fireplaces: Which One Is Right for Your Home?

Vented vs. Ventless Gas Fireplaces: Which One Is Right for Your Home?

If you’re shopping for a gas fireplace, one of the most important decisions you’ll make is choosing between a vented and a ventless (vent-free) system. Both options offer the convenience and comfort of gas heat, but they work very differently — and each comes with its own benefits and considerations.

This guide is designed to help you compare vented vs. ventless gas fireplaces side by side so you can make a confident, informed decision. If you’re still exploring how venting works at a high level, our article on whether gas fireplaces need a chimney is a great companion read. Once you understand the basics, this guide will help you narrow down what makes the most sense for your home.

SCHEDULE SERVICE NOW

The Core Difference: Venting vs. No Venting

At the simplest level, the difference comes down to how the fireplace handles exhaust:

  • Vented gas fireplaces send combustion byproducts outside your home.
  • Ventless gas fireplaces are designed to burn cleanly enough that they release heat directly into the room.

That single difference impacts installation, efficiency, air quality, and where each option works best.

Vented Gas Fireplaces: Pros and Cons

How Vented Gas Fireplaces Work
Vented gas fireplaces use a system that safely moves exhaust gases outdoors. This can be done through:

  • A direct vent system (sealed, dual-pipe design)
  • An existing chimney with a liner (often used with gas inserts)

Because combustion air and exhaust are controlled, vented systems protect indoor air quality while delivering consistent heat.

Pros of Vented Gas Fireplaces

  • Excellent indoor air quality protection
  • Wide design flexibility, including inserts, linear fireplaces, and multi-sided units
  • Strong, steady heat output
  • Often allowed in more rooms and jurisdictions than ventless options

Cons of Vented Gas Fireplaces

  • Installation can be more involved
  • May require exterior wall access or chimney modifications
  • Slightly more heat loss compared to ventless systems due to venting

Vented gas fireplaces are often the preferred choice for homeowners who prioritize long-term comfort, safety, and flexibility in design.

Ventless Gas Fireplaces: Pros and Cons

How Ventless Gas Fireplaces Work

Ventless (or vent-free) gas fireplaces do not use a chimney or exterior vent. Instead, they rely on clean-burning technology and built-in safety features to operate entirely within the room.

Pros of Ventless Gas Fireplaces

  • Very high heating efficiency (little to no heat loss)
  • Flexible installation options, especially in homes without chimneys
  • Lower upfront installation complexity
  • Delivers fast, noticeable warmth

Cons of Ventless Gas Fireplaces

  • Not permitted in all states or all rooms
  • Output limits are strictly regulated
  • Adds moisture and combustion byproducts to indoor air
  • Requires careful sizing and professional evaluation

Ventless fireplaces can be a good fit for certain spaces, but they require close attention to local building codes and proper installation.

How to Choose Between Vented and Ventless

Choosing between a vented and ventless gas fireplace depends on several factors, including:

  • Whether your home already has a chimney
  • Where the fireplace will be installed
  • Local building and safety codes
  • Your comfort level with vent-free systems
  • Whether heating performance or design flexibility is your top priority

If your main goal is long-term reliability, broader installation options, and peace of mind, many homeowners lean toward vented systems. If you’re focused on maximum efficiency in a specific space, a ventless fireplace may be worth exploring — where permitted.

Because these factors vary by home, region, and layout, professional guidance makes all the difference.

Get Expert Help from Fireside Home Solutions

At Fireside Home Solutions, we help homeowners throughout the Seattle and Portland areas compare gas fireplace options with real-world context — not just specs on a screen. Our team can explain how vented and ventless gas fireplaces perform in Pacific Northwest homes, what’s allowed locally, and which systems align best with your comfort and design goals.

Whether you’re upgrading an existing fireplace or planning a new installation, we’ll help you choose a solution that’s safe, efficient, and built to last.

Have questions or are you ready to take the next step? Contact Fireside Home Solutions or visit a showroom to explore gas fireplace options and get expert guidance tailored to your home.

Open post
Little girl toasting marshmallow on chopstick over fireplace decorated with traditional xmas ornaments, rear view. Child near brick fireside in cozy house during winter holidays. Christmas coziness

Can You Convert a Wood Burning Fireplace to a Gas Fireplace?

Can You Convert a Wood Burning Fireplace to a Gas Fireplace?

If you love the look of your wood burning fireplace but wish it were easier to use, cleaner, and more efficient, you might be wondering: Can you convert a wood burning fireplace to a gas fireplace? The short answer is yes — with the right planning, equipment, and professional help, converting your wood fireplace to gas can transform your hearth into a more convenient and effective heat source. Below, we’ll walk through what a wood to gas fireplace conversion involves, the options available, and why relying on experts like Fireside Home Solutions is essential — especially here in the Pacific Northwest.

SCHEDULE SERVICE NOW    

What Does It Take to Convert a Wood Burning Fireplace to Gas?

Converting a wood burning fireplace to gas isn’t as simple as swapping logs for logs that look like fire. It generally involves installing new gas components, updating venting or liners, and ensuring all safety systems are in place. Here’s a breakdown of what the process typically includes:

1. Evaluating Your Existing Fireplace and Chimney

Before any conversion work begins, a trained technician must inspect your existing wood burning fireplace and chimney. This evaluation checks:
  • Chimney condition and structure
  • Clearance and framing
  • Whether a liner or other venting system is needed
Some older fireplaces may require repairs or upgrades before gas components can be safely installed.

2. Choosing the Right Conversion Option

Once your space is evaluated, the next step is deciding how you want to convert your fireplace. You generally have a few options: Gas Fireplace Inserts

A popular solution for wood to gas fireplace conversion, gas inserts fit directly into your existing firebox. They’re highly efficient, sealed units that:<.p>

  • Provide consistent heat
  • Use less energy than an open wood fire
  • Often include remote controls or thermostats for easy operation

These inserts can transform an old fireplace into a modern heat source without removing the entire system.

Gas Log Sets

If you want the look of gas flames with minimal interior changes, a gas log set might be an option. These are installed inside your existing wood firebox and connect to a gas line. They produce a realistic flame and clean operation, though they’re generally less efficient than inserts when it comes to heating performance.

Direct Vent Gas Fireplaces

Some homeowners opt to remove the old wood firebox entirely and install a new direct vent gas fireplace. These systems use sealed combustion technology and are vented through an exterior wall rather than relying solely on the existing chimney. A professional can help you determine which of these options best fits your home’s layout, heating goals, and budget.

3. Installing Gas Lines and Venting

Converting your wood fireplace to gas means adding a gas supply line. A licensed technician will:

  • Run a dedicated gas line from your home’s main feed
  • Install appropriate valves and safety devices
  • Ensure all connections meet local building codes

Many conversions also involve installing or upgrading a chimney liner. This helps vent combustion gases safely and improves overall efficiency.

4. Sealing, Testing, and Final Safety Checks

Once components are installed, your technician will:

  • Seal gaps and ensure proper clearances
  • Test the gas flow and burner performance
  • Calibrate any thermostats or remote systems
  • Review safety features such as carbon monoxide detectors

This final step ensures your converted fireplace delivers warmth safely and efficiently.

Why Professional Installation Matters

Trying to convert a wood burning fireplace to gas on your own isn’t recommended — it’s both a safety and code issue. Gas fireplace systems involve:

  • Combustible fuels
  • Combustion air and ventilation
  • Precise clearances from framing and finishes

A licensed professional knows how to navigate local building codes, safety standards, and installation requirements — all of which are crucial to preventing hazards like gas leaks or carbon monoxide buildup.

That’s why, for any wood to gas fireplace conversion project, you should depend on skilled technicians with experience in gas fireplace systems.

Explore Fireplace Options with Fireside Home Solutions

At Fireside Home Solutions, we help homeowners across the Seattle and Portland areas convert wood burning fireplaces to modern gas systems that look great and operate safely. Whether you’re interested in a high-efficiency gas fireplace insert, a classic gas log set, or a full direct vent gas fireplace upgrade, our team can walk you through the best options for your space and lifestyle. We also offer comprehensive fireplace service — from inspections and gas line installs to venting upgrades and routine maintenance — ensuring your fireplace performs beautifully year after year.

Visit our fireplace service page to learn more and schedule an appointment.

Ready to convert your wood burning fireplace to gas?

Contact Fireside Home Solutions today to get expert guidance and professional installation you can trust.
Open post
A wood fireplace with a white brick exterior.

Do Gas Fireplaces Need a Chimney?

Do Gas Fireplaces Need a Chimney?

Short Answer: Not Always. If you’re wondering if a gas fireplace needs a chimney, the answer depends on the type of gas fireplace you choose. Many modern gas fireplaces are designed to work without a traditional chimney, making them a flexible and popular option for today’s homes. Below, we’ll first answer the question clearly, then break down how gas fireplace ventilation works in simple, homeowner-friendly terms.

Does a Gas Fireplace Need a Chimney?

No—many gas fireplaces do not need a chimney. Traditional wood-burning fireplaces rely on a chimney to remove smoke and gases. Gas fireplaces, however, burn much cleaner and use different venting methods. Some gas fireplaces vent through an exterior wall, some use a sealed pipe system, and others don’t vent at all. That flexibility is one of the biggest reasons homeowners choose gas.

How Gas Fireplace Ventilation Works (Made Simple)

All gas fireplaces must manage heat and exhaust safely—but they do it in different ways. The key difference is whether the fireplace is vented or vent-free.

Vent vs. Vent-Free Gas Fireplaces

Vented Gas Fireplaces

Vented gas fireplaces send exhaust gases outside your home. These systems are designed to safely remove combustion byproducts while keeping indoor air clean. There are a few common vented options:
Direct Vent Gas Fireplaces
Direct vent fireplaces use a sealed system with two pipes:
  • One pipe pulls fresh air in from outside
  • The other pipe sends exhaust gases back outside
Because the system is sealed, indoor air quality is protected, and no traditional chimney is required. Direct vent fireplaces can often be installed on an exterior wall, making them extremely versatile.
Gas Fireplace Inserts
If you already have a wood-burning fireplace and chimney, a gas insert fits into the existing opening. A liner is added inside the chimney to vent exhaust safely, improving efficiency and reducing heat loss compared to open fireplaces.
Vented Gas Log Sets
Vented gas logs are installed inside an existing fireplace and use the chimney to exhaust gases. While they look very realistic, they are designed more for ambiance than heating efficiency.

Vent-Free (Ventless) Gas Fireplaces

Vent-free gas fireplaces do not use a chimney or exterior vent at all. Instead, they are engineered to burn gas very cleanly and release heat directly into the room.

Are Ventless Gas Fireplaces Safe?

When properly installed and used according to manufacturer guidelines and local building codes, ventless gas fireplaces are considered safe. They include built-in safety features such as:
  • Oxygen depletion sensors (ODS)
  • Automatic shutoff systems
  • Strict output limits
That said, vent-free fireplaces are regulated differently depending on location, and they may not be permitted in every state or every room of the home. This is why professional guidance is essential when considering a ventless option.

Which Gas Fireplace Option Is Right for Your Home?

The best choice depends on:
  • Whether you already have a chimney
  • Your heating goals vs. ambiance goals
  • Installation location
  • Local building codes
  • Your comfort level with vented vs. vent-free systems
If you’re comparing efficiency, installation flexibility, or long-term value, understanding these differences can help you narrow down the right solution. For a deeper comparison between fireplace types, we cover that in a separate guide focused on decision-making.

Explore Gas Fireplaces at Fireside Home Solutions

At Fireside Home Solutions, we help homeowners throughout the Seattle and Portland areas find gas fireplaces that fit their homes, lifestyles, and safety requirements. From direct vent fireplaces and gas inserts to linear, multi-sided, and open hearth designs, our showrooms let you see how different systems work in person. Have questions about venting, safety, or installation? Contact our team or visit one of our local showrooms to get expert guidance and explore gas fireplace options designed for comfort, efficiency, and peace of mind.
Open post
Woman putting firewoods into burning fireplace in rustic room in farmhouse. Heating house in winter with wood burning stove. Fireplace heating alternative to gas and electricity

How to Open a Fireplace Flue

How to Open a Fireplace Flue

Using Your Fireplace Damper

Understanding how to properly open and close your fireplace flue is essential for safe, efficient fireplace use. Whether you own a traditional wood-burning fireplace or a modern unit with a built-in damper system, knowing how the flue works helps ensure smoke vents correctly and your home stays comfortable. Here’s a simple guide to what a flue is, why it matters, and how to adjust it safely.

Need professional fireplace service from friendly, dependable professionals? Schedule with Fireside Home Solutions today and our team will be happy to help.

What Is a Fireplace Flue?

The flue is the vertical passage inside your chimney that allows smoke, gases, and exhaust to move safely out of your home. Think of it as the chimney’s airway. Inside that flue, there is a movable component called the damper. When people talk about “opening the flue,” they are actually opening the damper—the metal plate that opens or closes to let air flow through the flue. If the damper is closed while a fire is burning, smoke has nowhere to go and will quickly fill the room. If it’s left open after the fire is out, you can lose heated indoor air through the chimney. That’s why understanding the difference—and how to operate the damper—is so important.

When and Why You Should Open or Close the Flue

Your flue (via the damper) should be adjusted based on whether your fireplace is in use:
  • Open the flue before starting a fire. This allows proper ventilation so smoke, fumes, and combustion gases escape up the chimney instead of entering your home.
  • Leave it fully open while the fire is burning. Even smoldering embers produce smoke and gases.
  • Close the flue once the fire is completely out and the fireplace is cool. This helps prevent warm indoor air from escaping and stops outside drafts from coming in.
If you’re ever unsure whether a fire is fully extinguished, give it extra time before closing the damper.

How to Open a Fireplace Flue (via the Damper)

Because fireplace designs can vary, your specific damper style may look a little different—but most fall into one of two categories: throat dampers (located just above the firebox) or top-mount dampers (located at the top of the chimney). Always make sure the fireplace is cold before reaching into or adjusting any components.

1. Locate the Damper Control

For throat dampers, you’ll usually find:
  • A lever you push or pull
  • A rotary knob you twist
  • A sliding handle inside the firebox
For top-mount dampers, the control is typically a metal chain that hangs down into the fireplace.

2. Check Whether the Damper Is Open or Closed

Before lighting a fire, visually verify the damper’s position:
  1. Look up into the chimney with a flashlight.
  2. An open damper will reveal an unobstructed vertical passage.
  3. A closed damper will appear as a solid metal plate blocking the flue.

3. Open the Damper

Adjust your damper control according to your model:
  • Lever or handle: Push or pull until the plate swings fully open.
  • Rotary knob: Turn until you feel the damper move into the open position.
  • Top-mount damper chain: Release the chain from its notch so the spring mechanism opens the damper at the top of the chimney.
Make sure the damper is wide open before starting your fire to ensure proper airflow.

4. Close the Damper After the Fire Is Out

Once the fireplace is completely cooled, return the damper to the closed position to improve energy efficiency and prevent drafts. Never close it while ashes are still hot or smoldering.

Tips for Safe and Easy Damper Use

  • Inspect the damper annually for rust, warping, or debris buildup.
  • Keep the fireplace clean to help the damper operate smoothly.
  • Always open the damper before lighting kindling—smoke forms quickly.
  • If the damper sticks or won’t fully open, schedule a professional inspection.
A well-functioning flue and damper system keeps your home safe and your fireplace performing at its best.

Why Choose Fireside Home Solutions?

From helping you understand your fireplace components to providing expert maintenance and repairs, Fireside Home Solutions is here to ensure your system runs safely and efficiently. Serving the Seattle and Portland areas, our team specializes in fireplaces, garage doors, and year-round home comfort solutions. If you have questions about your fireplace or need help servicing your damper or chimney system, contact us today. Call us to learn more about our fireplace and garage door services or to schedule your next tune-up.

Posts navigation

1 2 3 4